
Controlling Android TV and Kodi with Logitech Harmony and Flirc
This is a short post about controlling Android TV using a Logitech Harmony infrared remote control and a Flirc USB.
Last Christmas I gifted an Nvidia Shield TV. The Shield TV is an Android TV device, which in this case would mostly be used for playing media through Kodi and Netflix.
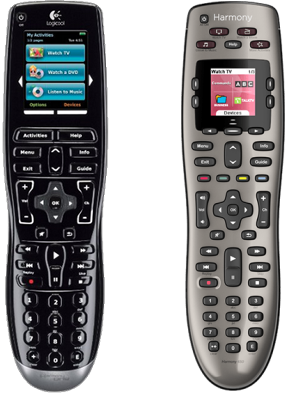
The lucky recipient of the gift uses a Logitech Harmony universal infrared remote control. As the latest revision of the Shield TV (‘16GB, 2017’) lacks an infrared receiver, a Flirc USB was included. Flirc receives infrared commands and converts them to keypresses by emulating human interface devices, such as keyboards and game controllers.
In Flirc’s firmware is a built in Kodi profile that can be used with a Logitech Harmony remote immediately. The profile uses Kodi’s keyboard controls. Unfortunately, the keyboard keys used do not match with other Android applications, which prevents a single Logitech Harmony activity from controlling Android TV adequately. In addition, the Harmony device configuration does not power the Android TV device on and off when needed.
In this post the Logitech Harmony and Flirc are configured in such a way that they will work with both Android TV and Kodi. This guide can also be used with any other infrared remote.
This post concerns an update of a previous post. In the older post, Flirc mappings were mostly made using keyboard keys. Now most keys use media keys from the USB HID Usage Consumer Page instead. A bonus is that it is not required anymore to modify Kodi’s configuration by hand, since media keys are supported by both Android TV and Kodi natively.
Configuring the Logitech Harmony remote
Depending on which remote model you have, use either the older Harmony Remote Software or the newer MyHarmony to configure the remote.
Add a new device using the following information:
- Device (only needed for Harmony Remote Software): Computer -> Media Center PC
- Manufacturer: Flirc
- Model: Kodi
After the device is added, it might be named ‘Flirc Media Player’. This is normal.
A Shield TV can be switched on and off using Flirc, and possibly other Android TV devices as well. In the software for the Harmony remote, the new device’s power settings can be configured as follows to allow activities to switch the device on and off when necessary:
- ‘I want to turn off this device when (it’s) not in use’.
- ‘A button on the remote for On, and a different button for Off’ / ‘I press two different buttons for on and for off’.
- Use command ‘ZoomLevel1’ as the (only) power on command.
- Use command ‘PowerOff’ as the (only) power off command.
This is all the configuration that is strictly necessary for the Logitech Harmony remote. It is up to the user to configure one or more activities and to map commands to buttons on the remote. An example mapping is given in Appendix A.
Configuring Flirc
Use the Flirc configuration software. Check which firmware version the Flirc is running. See which configuration file you need.
| Flirc firmware version | Flirc configuration file |
|---|---|
| 4.4.x | flirc-4.4.2-androidtv-kodi.fcfg |
| 4.9.x | flirc-4.9.3-androidtv-kodi.fcfg |
Load the matching configuration file into the Flirc. If you have a firmware between 4.4 and 4.9, try each and see which works. If none work, you can make your own Flirc configuration for the firmware you have using the scripts in Appendix B.
Ensure that any built in profiles are disabled to avoid configuration conflicts. The infrared commands in the configuration file and in the Flirc Kodi device profile for the Logitech Harmony are exclusively used by Flirc and should therefore not conflict with any other devices.
Alternatively, use the configuration overview in Appendix A or the scripts in Appendix B to configure the Flirc manually.
After you are done, connect the Flirc with the Android TV device. You can immediately use it to navigate both Android TV and any applications you start, such as Kodi.
The Shield TV’s USB ports are on the back of the device. If some remote commands are not received, consider using a USB extension cable to bring the Flirc to the front.
Appendix A: Configuration overview
Below is an overview of the configuration between the Harmony remote and the Android TV device.
The first column concerns a reference mapping of the Harmony buttons to Harmony commands in the second column. This configuration is done in the Harmony configuration software. Note that these columns map to the buttons on the Harmony One and Harmony 650. A different mapping might be more appropriate for other Harmony models.
The third column has the key codes that the Flirc associates with the Harmony infrared commands from the second column. The fourth and fifth columns show the HID commands (‘usages’) that the key codes from the third column respresent, from the HID Usage Tables Pages 7 (Keyboard/Keypad), and 13 (Consumer) respectively. These are sent by the Flirc through emulated HID devices as button presses to the Android TV device.
The sixth column shows Android TV and Kodi functions that are available through the Harmony remote and Flirc. After configuration, the first and sixth columns can be used as a reference functional mapping of user controls to system functions, hiding the technical details from the columns between them.
| Harmony button | Harmony command | Flirc key code | USB HID usage (Keyboard) | USB HID usage (Consumer) | Android TV/Kodi function |
|---|---|---|---|---|---|
| (none) | PwrOff | 50 102 | Sleep | Power off (discrete) | |
| (none) | ZoomLevel1 | 1 102 | Consumer Control | Power on (discrete) | |
| (none) | ZoomLevel2 | 48 102 | Power | Power on/off (toggle) | |
| Up | DirectionUp | 66 102 | Menu Up | Up | |
| Down | DirectionDown | 67 102 | Menu Down | Down | |
| Left | DirectionLeft | 68 102 | Menu Left | Left | |
| Right | DirectionRight | 69 102 | Menu Right | Right | |
| Channel up | PageUp | 156 102 | Channel Increment | Page up | |
| Channel down | PageDown | 157 102 | Channel Decrement | Page down | |
| OK | Select | 65 102 | Menu Pick | Select | |
| Back | Back | 70 102 | Menu Escape | Back | |
| Menu | ContextMenu | 64 102 | Menu | Menu | |
| Play | Play | 176 102 | Play | Play/Pause | |
| Pause | Pause | 176 102 | Play | Play/Pause | |
| Stop | Stop | 183 102 | Stop | Stop | |
| Rewind | Rewind | 180 102 | Rewind | Rewind | |
| Fast Forward | FastForward | 179 102 | Fast Forward | Fast forward | |
| Skip Back | SkipBack | 182 102 | Scan Previous Track | Skip back | |
| Skip Forward | SkipForward | 181 102 | Scan Next Track | Skip forward | |
| Volume Up | VolumeUp | 233 102 | Volume Increment | Volume up | |
| Volume Down | VolumeDown | 234 102 | Volume Decrement | Volume down | |
| 1 | 1 | 0 30 | 1 | 1 | |
| 2 | 2 | 0 31 | 2 | 2 | |
| 3 | 3 | 0 32 | 3 | 3 | |
| 4 | 4 | 0 33 | 4 | 4 | |
| 5 | 5 | 0 34 | 5 | 5 | |
| 6 | 6 | 0 35 | 6 | 6 | |
| 7 | 7 | 0 36 | 7 | 7 | |
| 8 | 8 | 0 37 | 8 | 8 | |
| 9 | 9 | 0 38 | 9 | 9 | |
| 0 | 0 | 0 39 | 0 | 0 | |
| Clear | . (period) | 0 42 | Backspace | Clear character left from cursor | |
| Enter | ZoomLevel3 | 0 40 | Keypad Enter | Confirm text entry | |
| Info | Info | 0 12 | I | Get information (Kodi only) | |
| LCD - Home | ParentFolder | 8 40 | Lcmd + Enter | Go to home screen | |
| LCD - Full screen | FullScreen | 0 43 | Tab | Fullscreen/GUI switch (Kodi only) | |
| LCD - Toggle subtitles | ShowSubtitles | 0 23 | T | Toggle subtitles (Kodi only) | |
| LCD - Next subtitle | NextSubtitle | 0 15 | L | Next subtitle (Kodi only) |
Appendix B: Configuration scripts
It is possible to create your own Flirc configuration. This allows you to use any remote you want, and to create configuration files for newer Flirc firmware versions once compatibility breaks again.
The scripts are below. Be careful. The first thing the script will do once a Flirc is connected is to erase its existing configuration.
Note that some customization might be needed based on the remote you use. The button labels are based on Harmony’s button/command names used in the table of Appendix A. Most names speak for themselves, but there are some exceptions:
- PowerOff is a discrete power off signal. This means that it will only turn the device off, not on.
- ZoomLevel1 is used as a discrete power on signal. This means that it will only turn the device on, not off.
- ZoomLevel2 is used as a power toggle signal. This means that it will turn the device on when it is off, and vice versa.
You probably only want to use a single power function (discrete buttons using PwrOff and ZoomLevel1, or power toggle using ZoomLevel2). You can remove the script lines you do not need.
For Linux, the script program-flirc.sh:
#!/usr/bin/env bash

flirc_util wait
flirc_util format

echo "Press button: PowerOff" && flirc_util record_api 50 102
echo "Press button: ZoomLevel1" && flirc_util record_api 1 102
echo "Press button: ZoomLevel2" && flirc_util record_api 48 102
echo "Press button: Up" && flirc_util record_api 66 102
echo "Press button: Down" && flirc_util record_api 67 102
echo "Press button: Left" && flirc_util record_api 68 102
echo "Press button: Right" && flirc_util record_api 69 102
echo "Press button: Channel up" && flirc_util record_api 156 102
echo "Press button: Channel down" && flirc_util record_api 157 102
echo "Press button: OK" && flirc_util record_api 65 102
echo "Press button: Back" && flirc_util record_api 70 102
echo "Press button: Menu" && flirc_util record_api 64 102
echo "Press button: Play" && flirc_util record_api 176 102
echo "Press button: Pause" && flirc_util record_api 176 102
echo "Press button: Stop" && flirc_util record_api 183 102
echo "Press button: Rewind" && flirc_util record_api 180 102
echo "Press button: Fast forward" && flirc_util record_api 179 102
echo "Press button: Skip back" && flirc_util record_api 182 102
echo "Press button: Skip forward" && flirc_util record_api 181 102
echo "Press button: Volume up" && flirc_util record_api 233 102
echo "Press button: Volume down" && flirc_util record_api 234 102
echo "Press button: 1" && flirc_util record_api 0 30
echo "Press button: 2" && flirc_util record_api 0 31
echo "Press button: 3" && flirc_util record_api 0 32
echo "Press button: 4" && flirc_util record_api 0 33
echo "Press button: 5" && flirc_util record_api 0 34
echo "Press button: 6" && flirc_util record_api 0 35
echo "Press button: 7" && flirc_util record_api 0 36
echo "Press button: 8" && flirc_util record_api 0 37
echo "Press button: 9" && flirc_util record_api 0 38
echo "Press button: 0" && flirc_util record_api 0 39
echo "Press button: Clear" && flirc_util record_api 0 42
echo "Press button: Enter" && flirc_util record_api 0 40
echo "Press button: Info" && flirc_util record_api 0 12
echo "Press button: LCD - Home" && flirc_util record_api 8 40
echo "Press button: LCD - Full screen" && flirc_util record_api 0 43
echo "Press button: LCD - Toggle subtitles" && flirc_util record_api 0 23
echo "Press button: LCD - Next subtitle" && flirc_util record_api 0 15
For Windows, the script program-flirc.bat:
@echo off

if exist "C:\Program Files\Flirc" cd "C:\Program Files\Flirc"
if exist "C:\Program Files (x86)\Flirc" cd "C:\Program Files (x86)\Flirc"

flirc_util.exe wait
flirc_util.exe format

echo Press button: PowerOff && flirc_util.exe record_api 50 102
echo Press button: ZoomLevel1 && flirc_util.exe record_api 1 102
echo Press button: ZoomLevel2 && flirc_util.exe record_api 48 102
echo Press button: Up && flirc_util.exe record_api 66 102
echo Press button: Down && flirc_util.exe record_api 67 102
echo Press button: Left && flirc_util.exe record_api 68 102
echo Press button: Right && flirc_util.exe record_api 69 102
echo Press button: Channel up && flirc_util.exe record_api 156 102
echo Press button: Channel down && flirc_util.exe record_api 157 102
echo Press button: OK && flirc_util.exe record_api 65 102
echo Press button: Back && flirc_util.exe record_api 70 102
echo Press button: Menu && flirc_util.exe record_api 64 102
echo Press button: Play && flirc_util.exe record_api 176 102
echo Press button: Pause && flirc_util.exe record_api 176 102
echo Press button: Stop && flirc_util.exe record_api 183 102
echo Press button: Rewind && flirc_util.exe record_api 180 102
echo Press button: Fast forward && flirc_util.exe record_api 179 102
echo Press button: Skip back && flirc_util.exe record_api 182 102
echo Press button: Skip forward && flirc_util.exe record_api 181 102
echo Press button: Volume up && flirc_util.exe record_api 233 102
echo Press button: Volume down && flirc_util.exe record_api 234 102
echo Press button: 1 && flirc_util.exe record_api 0 30
echo Press button: 2 && flirc_util.exe record_api 0 31
echo Press button: 3 && flirc_util.exe record_api 0 32
echo Press button: 4 && flirc_util.exe record_api 0 33
echo Press button: 5 && flirc_util.exe record_api 0 34
echo Press button: 6 && flirc_util.exe record_api 0 35
echo Press button: 7 && flirc_util.exe record_api 0 36
echo Press button: 8 && flirc_util.exe record_api 0 37
echo Press button: 9 && flirc_util.exe record_api 0 38
echo Press button: 0 && flirc_util.exe record_api 0 39
echo Press button: Clear && flirc_util.exe record_api 0 42
echo Press button: Enter && flirc_util.exe record_api 0 40
echo Press button: Info && flirc_util.exe record_api 0 12
echo Press button: LCD - Home && flirc_util.exe record_api 8 40
echo Press button: LCD - Full screen && flirc_util.exe record_api 0 43
echo Press button: LCD - Toggle subtitles && flirc_util.exe record_api 0 23
echo Press button: LCD - Next subtitle && flirc_util.exe record_api 0 15